Video: Making An End Table
In this video, April Wilkerson and Laura Kampf build an end table with an epoxy center.
April Wilkerson and Laura Kampf combine forces to build an end table with a twisted base and a unique tabletop featuring an epoxy center.
You can find more great projects and techniques from April Wilkerson at her website.
Featured Tools:


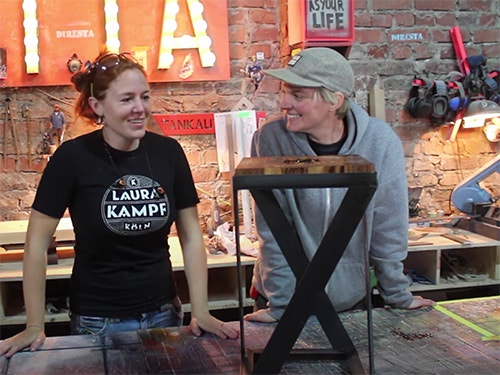
April Wilkerson: Hey, everyone. I am not in my normal shop today I'm hanging out with the awesome and wonderful Laura Kampf. Do I pronounce your name right?
Laura Kampf: That's fine. Yes, that's awesome.
April: Hanging out with Laura today and we're going to be building - What are we building?
Laura: We are trying to build a nightstand but we are each having a different take on it. Exactly. April's going to do her version. I'm going to do my version and we're each going to do our own video as well. All right.
April: Let's get going?
Laura: Let's do it.
April: We very quickly decided to change plans and instead of working separately on separate tables, decided to work on the same table together. We decided to make an end grain end table where we would leave a void in the center so that we can fill it full of tokens from our time together and then epoxy it in.
Laura: Like the pencil?
April: Oh yes, the pencil, perfect or anything else, like you were talking about the tickets like we go buy the material, throw it in the epoxy.
Laura: That's good. That's cool.
April: With the plan established we raided Laura's scrap bin in order to find some stalk to work with. Went over to Laura's jointer and first jointed one of the edges in one of the phases, then Laura made it go into full transformer mode and turned the jointer into a thickness planer so that we could then thickness it down to the size that we needed. Of course, both of us having tape measures because, well, she works in metric and I work in imperial. After that, we moved over to the table saw.
I first cut the stalk into strips and then rotated the fence around and cut it into pieces. While doing that Laura found the different scrap that would contrast but also go with the zebrawood. She first squared it up over at the jointer and then cut it to size over the table saw while I sanded up all of the small pieces. Then we started playing with different grain orientations and patterns.
Laura and I only had a few days to get this project done so instead of doing a proper glue up which is layer by layer we decided to take hold of pieces, squish them together and hope for the best which meant lots of clamps.
Now that we had the big chunk, we took it over the table saw and cut it into four pieces. Since the chunk is taller than the table saw, Laura ran it through once, flipped it around, and ran it through again. Now, we originally thought to make the larger blocks offset from the corners, however, we changed our mind and decided to put them directly in the corners.
To give that center section just a little bit nicer of a backdrop Laura grabbed a piece of scrap brass marked it into the size it needed to be using a nice bit and then cut it using an angle grinder. Next, we moved on to yet another glue-up. We grabbed a scrap piece of plywood to make up the bottom and then glued the pieces to the plywood, brought out the clamps once again, and then let it set up overnight.
After removing all of the clamps we gave it a good sanding or well, Laura gave it a good sanding. I just kind of poked around her shop, to be honest.
Laura: It's always the best moment.
April: Yes. Now that I'm thinking about it I don't even remember which oil we used but it really made that zebrawood grain look nice. We set the top over to the side to dry and then started making a base. The base is just made from mostly scrap metal that Laura had hanging around, cut it to size using the bandsaw, and then tacked and welded two frames together made from angle iron. One of the frames will be used for the top and then another one for the base. We came back with a grinding wheel to make them flat and smooth just for painting later on.
Laura: Why is this so red?
April: I don't know. Maybe because of the water. I think it rocks. The epoxy didn't come out perfect it's supposed to be clear.
Laura: I don't know why but I mixed the epoxy in one of those old cans and it's either the leftover coconut water, but I think I washed them out or it's probably the aluminum can that reacted with epoxy and somehow it turned kind of purple, red-ish.
April: Unfortunately, that did not come out clear but still it's part of the story, it's part of the build and it's part of Laura's table that she must keep at this point. Yes, that's going to be it for this one. I hope that you all enjoyed the project, getting to see Laura's shop.
Fastest One-Handed Bar Clamps
How to Join Carcase Miters with Splines - A Free Video from the Center for Furniture Craftsmanship


Keep the inspiration coming!
Subscribe to our newsletter for more woodworking tips and tricks